
Answer 8 quick questions to get a personalised quote from Webski
January 20 2011

Click here » The IMGr jQuery Plugin used for Landing page with Rounded Images « to view the EXAMPLE.
Click here » The IMGr jQuery Plugin used for Landing page with Rounded Images « to download the full DEMO.
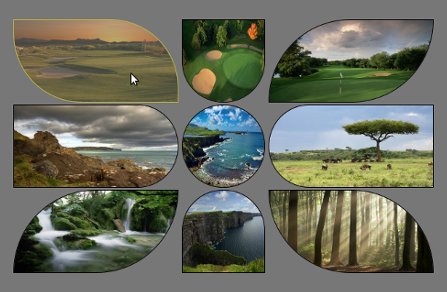
IMGr stands for Image Rounder and it’s a jQuery plugin and in this tutorial I used it to create a nice looking and unique landing page. For the developers it is very easy to create something that will be still and never be changed so the real troubles and headaches are coming when something twisted has to be editable from some CMS. This example can be easily modified to your CMS and these rounded images can be replaced from there; no need for photoshop editing of the images and creating PNG images that will be transparent because the images are normal rectangle .JPG images, just like these.

This is the HTML that I’ve used for this example.
<div style=”padding:100px 100px 200px 500px;”>
<div>
<a id=”link1″ href=“#”><img class=”ex1″ src=“timthumb1.jpg” height=”120″ width=”240″ /></a>
<a id=”link2″ href=“#”><img class=”ex2″ src=“timthumb2.jpg” height=”120″ width=”120″ /></a>
<a id=”link3″ href=“#”><img class=”ex3″ src=“timthumb3.jpg” height=”120″ width=”240″ /></a>
</div>
<div>
<a id=”link4″ href=“#”><img class=”ex4″ src=“timthumb4.jpg” height=”120″ width=”240″ /></a>
<a id=”link5″ href=“#”><img class=”ex5″ src=“timthumb5.jpg” height=”120″ width=”120″ /></a>
<a id=”link6″ href=“#”><img class=”ex6″ src=“timthumb6.jpg” height=”120″ width=”240″ /></a>
</div>
<div>
<a id=”link7″ href=“#”><img class=”ex7″ src=“timthumb7.jpg” height=”120″ width=”240″ /></a>
<a id=”link8″ href=“#”><img class=”ex8″ src=“timthumb8.jpg” height=”120″ width=”120″ /></a>
<a id=”link9″ href=“#”><img class=”ex9″ src=“timthumb9.jpg” height=”120″ width=”240″ /></a>
</div>
</div>
As you can see the HTML structure, there is one div that is used as a wrapper and three divisions within. Every division contains three image links and their dimensions are set exactly to fit with my design. These are the links that will lead you to the following pages of your web site. Every anchor has it’s own id and every image is associated to specific class. Now it’s time to use the IMGr plugin. Two javascript files must be included, first the main jQuery library and than the IMGr.
After the setup is done, it’s time to use the IMGr plugin. Let’s examine this line of code $(“img.ex1″).imgr({size:”1px”,color:”black”,radius:”0px 120px 0px 120px”}); Via first selector we have selected all images that are associated with ext1 class. The .img() method is applied to all these images. This method is wrapping the images with a span element and there are a few parameters that can be set.
First parameter is the size of the border that can be set and shown on the rounded image and it must be in pixels.
The second is the colour of the border. There are approximately 100 predefined colors such as aqua, azure, beige, bisque, black, blue, violet, brown etc. also you can write the hex code for the colour that you want.
Radius is the third parameter that can provide you to set the radius of every angle of the image and it must be in this format radius:”0px 120px 0px 120px”. Every number is associated with the radius of specific angle.
First – TL(Top Left); Second – TR(Top Right); Third – BR(Bottom Right); Fourth – BL(Bottom Left).
There is another parameter that can be set and that is the style of the border but I don’t use it for this example because its default value is set to “solid” and that was the style that I want to use so that’s why I don’t change it.
This will work on every browser including IE6. I’ve added one more functionality that created me troubles only in IE8 and I haven’t fixed it yet. I’ve added some pieces of jQuery code.
$(“img.ex1″).hover(function() {
$(this).imgr({size:”1px”,color:”yellow”,radius:”0px 100px 0px 100px”});
$(“#link1”).children(“span.imgr”).animate({opacity: ‘0.5’}, 80);
} ,
function() {
$(this).imgr({size:”1px”,color:”black”,radius:”0px 120px 0px 120px”});
$(“#link1”).children(“span.imgr”).animate({opacity: ‘1’}, 80);
} );
As you can see, I’ve created hover function for every image that makes some transformations such as changing the colour of the border (in this case to yellow) and changing the radius for some angles. Also I’ve used the .animate() method to create a nice animation that makes quick reducing the opacity of the image. Also there is a callback function that resets the changed properties to defaults.
Here is the full jQuery code, except for the other seven remaining images.
Click here » The IMGr jQuery Plugin used for Landing page with Rounded Images « to view the EXAMPLE.
Click here » The IMGr jQuery Plugin used for Landing page with Rounded Images « to download the full DEMO.
 Web Design
 Telco Drafting
 Marketing, SEO, PPC & Social
 Commercial & Residential
 Graphic Design
 3D Modelling
 Hosting & Support
 Game Development
 Mobile Apps
 Other Services